Welcome Back G-body enthusiasts! Front G-body inner fender modifications are the topic of this update. Hopefully this information will help a lot of Hot Rodders and G-body folks out there with plastic inner wheel wells for the front fenders. This information I am giving out is something I came up with and have not found anybody doing this to plastic parts yet on the G-body. I hope you enjoy this process that is illustrated here.
-The Problem-
I am sure many of you have the same thoughts about the inner fenders of most of the G-body cars and their ugliness . There are stand-offs and knobby looking structures that secure many vital reservoirs needed for daily driving. However, in the hobby, we rarely drive our cars daily and many ugly reservoirs get replaced with shiny parts anyway. On the HotRodRegal, shiny reservoirs will be used at a later time in the build. So, the issue was how to make these unsightly inner fenders look better.
-Alternatives-
I started off by doing internet searches for different inner fenders and didn’t like what was found for the most part. There are a few fortunate models (malibu wagons) that have very nice inner fenders that are smooth and look custom, but rare,hard to obtain and don’t fit Buicks. There are complete metal replacements that many G-body owners use, but this looks a little to “drag strip” for my taste. I was looking for something that looked “stock but not”.
-The Solution-
Like any good GM guy; I have a stash, or rather hoard of spare parts through multiple vehicle purchases, swap meets, e-bay, Craigslist, etc. I happen to have a spare set of front fenders with decent inner fenders still attached. The initial thought was to “Heat and shape” the plastic. The first trial was with a heat gun and metal forming tools… NOPE… It warped the inner fenders and they looked like crap. The second try was to use a more concentrated and higher heat source – yup, you guessed it, TORCH = FIRE >;) Unfortunately, this made the fiberglass impregnated plastic inner fenders very brittle and they would crack at the alterations. Finally a Co-worker (Al), suggested a soldering iron. This worked fantastic. I’m certain one could have purchased the plastic welder from Eastwood, but why when a 3$ soldering iron from Harbor Freight works fine…This concentrated heat melts the inner fender at a very small spot allowing a “welding” operation to take place. So here is how this works:
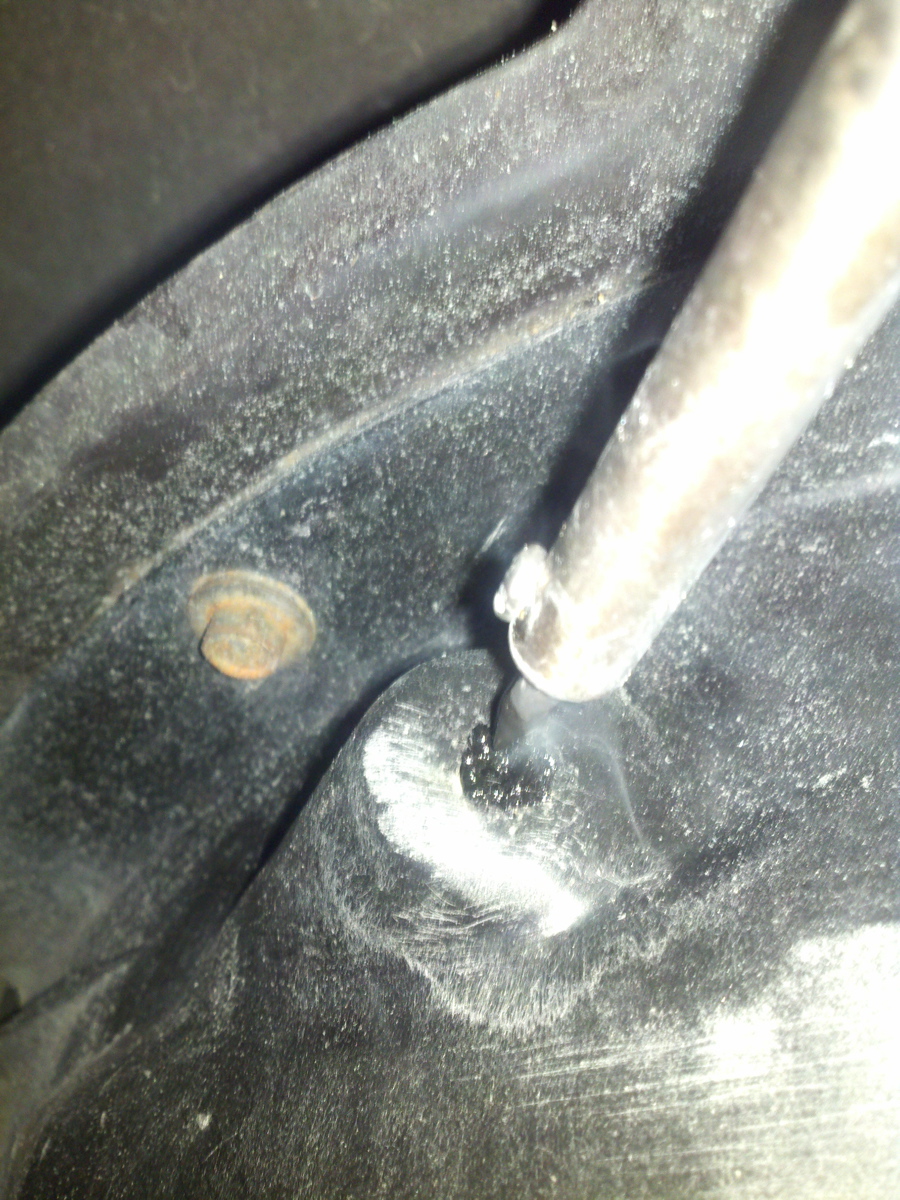
I started off small. Filling a hole from a stand-off that I intended to keep.

Here the Soldering Iron Heats up the surrounding material in the hole so a bond will be formed with the filler material.
The one thing worth mentioning at this point is to have spare parts. I used excess material from the first trial parts to fill the holes. The next step was to fill the hole with filler material and make the parts become one.

Melt the filler material and fill the hole. It’s recommended that excess is used to fill the hole.
The last part of this experiment was to obtain a finished look. I used a Durablock with 80 grit paper.

This finished repair will become invisible after a trip to the paint shop. This will appear as if nothing was ever attached here. The really cool thing about this style of repair is that you will not have to worry about body filler cracking at a later time and ruining your paint job!
So this is the concept in simple form. This can be used to fill holes, repair cracks, shape parts, add shapes, or smooth the entire fender as shown in the following photos.
-Advanced plastic shaping / welding-
The following shows how I took spare material from donor parts and spliced them into the final piece. This gave me the “Stock but Not” look I was trying to create. Enjoy!

This photo shows the large stand-offs cut out of the passenger side inner fender. I am holding a patch / splice panel I cut out from a spare inner fender. This will be “tack welded” into position and finished out like the hole repair.

This driver side inner fender had many stand-offs that were oddly shaped. When the reservoirs were mounted to the inner fender, you wouldn’t see these unsightly shapes. Once the reservoirs are removed, they stand out like a sore thumb! The unorganized appearance creates a visual “noise” when looking at an engine bay, causing the viewer to not like what they see. Simplicity is the key!
Another key-note during this process, is when cutting out the unwanted shapes keep the corners rounded and deburr all edges. This will strengthen the patch and ward off future cracking.

In this close up of one of the patch panels, you can see the process in work. Perform multiple “tack welds” around the perimeter until no spaces exist. This technique is much like what would be used when patching sheet metal.

This view shows a finished “bead weld”. This will be dressed later when all plastic welding is finished. Also, this area in the foreground use to have a round stand-off. Now this area has been made to have a flat edge with angled corners.
Granted, these modified inner fenders did take some time to complete; but it will clean up the engine bay considerably. The eye will not be drawn to the unsightly stand-offs, but rather ignore the simple and stock looking inner fender and focus on whats really important – the engine!

This is the Buick inner fender after the modifications are complete. It still has a stock appearance, but much cleaner and less busy.

From the front, its easy to see how much these were cleaned up. There are large simple geometric shapes now instead of a multitude of spikes. They have a lower profile, cleaner look, and retain the stock functionality and strength.
The battery areas in the front of each inner fender will be covered with simple plates to further the “Clean” look.

Just so you’re not thinking “body shop guy” or it’s an expensive process. These are the simple hand tools I used to perform this modification. Anybody can do this as long as you have some filler material or spare parts and some time. Actually, the thought crossed my mind to take other fenders from other cars and splice them in, but I had already decided on the Buick “Stock-but Not” look.
I hope you enjoyed this post, and I hope you can adopt this technique to your project. It’s all about promoting the hobby guys and gals!
Happy Hot Rodding!
-Matt