An LS engine wire harness clean-up is something that should be considered if you plan to swap one of these engines into your older car. The appearance of the coil brackets, fuel injectors, and the associated LS engine wire harness is a very common complaint that many people have about the LS engine. Some have chosen to hide the coils, remove the coil brackets, cover the injectors and associated wires. I have chosen to keep the coils, brackets, injectors and wire harness in the stock locations. Regardless of which option you choose for your LS engine, it is a very distinct looking machine and the factory stuff needs a little sprucing up!
Recently, I modified the coil brackets and had them powder coated at Gateway Powder Coating in an attempt to clean-up the coil installation (see: “Gateway Powder Coating – LS engine coil brackets“). This was a success, but the LS engine wire harness needed attention now. I contacted Dwight Van Lake at Whitmor Wirenetics for an aerospace style, LS engine wire harness clean-up solution.

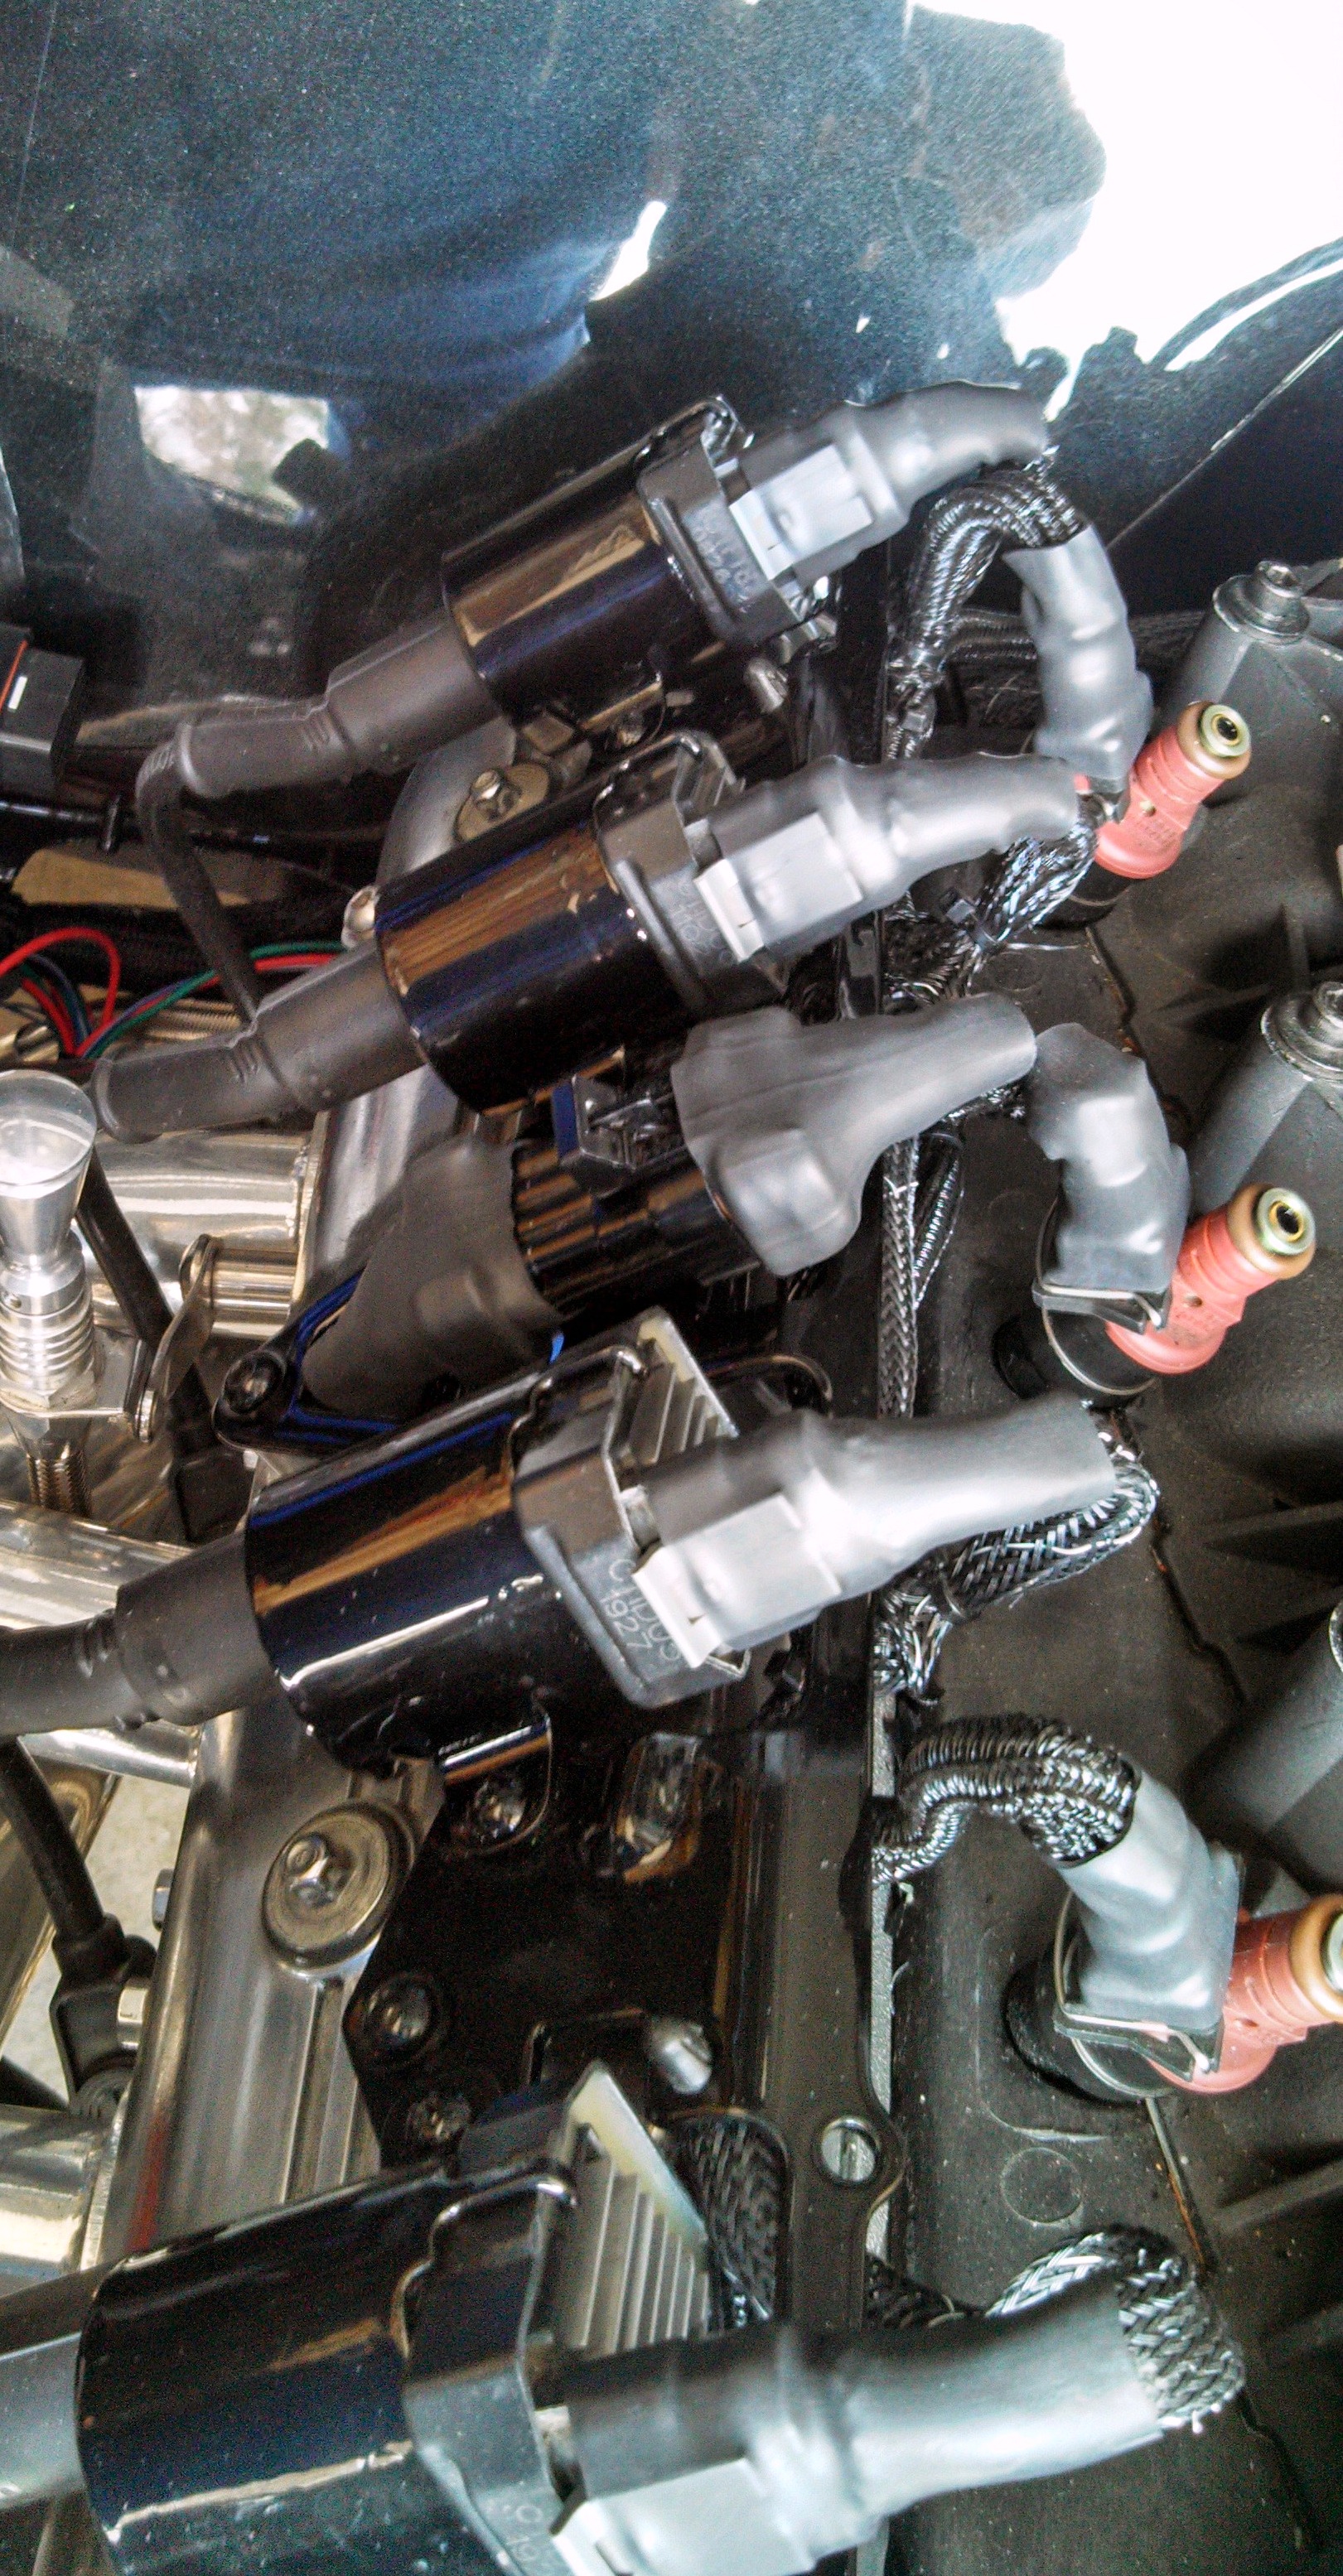
Whitmor Wirenetics is a manufacturer and distributor of MIL Spec. quality wires, cables and various tubing products. I was initially drawn to them for their extensive heat shrink and booting selection. If I had not already purchased an aftermarket wire harness (more on that in the future), I would have used many of the wire bundle boots they have to offer. The boots are expanded heat shrink material that offer maximum security, safety, and strain relief of the wire bundles at the break out points; plus they just look cool. Whitmor Wirenetics also has a very large selection of straight heat shrink tubing of various sizes and shrink rates. I have used similar materials in the past on aircraft wire bundles, but was not able to obtain any for personal use.
Now having found Whitmor Wirenetics, I purchased the straight shrink tube (part # WS5034-1.5-0) that is a 4 to 1 shrink ratio and measures 3.5 inch in expanded form and, after heated, will shrink to approximately 1/4 inch. This shrink material was used on the main coil harness connectors, as well as on the injector harness, coil plugs, and other sensors on the motor. The result is a plug boot that encompasses the plug, wires leading into the plug, and any protective braiding around the wires. This newly formed boot acts as another protective layer, a mechanical support for the wire bundle, and a cosmetic finish that is nicer than a multi-colored group of wires terminating at a plug. Also you need a type of adhesive tape to keep things in place as you shrink the tubing; I used HMT200A as suggested by Dwight.
Follow along with the pictures and captions to learn how I accomplished this simple clean-up technique.


My goal was to clean-up the LS engine coil brackets and associated wires on top of the engine while keeping things as maintenance friendly as possible. The newly formed heat shrink boots over the plugs will match many of the design qualities already present in this build. While there are many ways to clean up a wire harness, this method was my simple solution.
Keep checking back for a very big development with the LSX El Camino! Old school meets new school with a punch!
1 thought on “LS engine wire harness clean-up”